Raspberry Pi Mini AV Display
These car AV display are getting pretty cheap. They run off 12V however. But I suspect it internally runs on 5V, with a stepdown.
This one is from ebay: "CAR REAR VIEW KIT 4.3" TFT LCD MONITOR Screen Reverse Camera Kit DVD VCR O5" and this is it's specification:
Feature:
4.3\" LED Backlight Color TFT LCD Car monitor.
High-resolution picture.
Full color LED backlight display.
With 2 video input: White video cable connects to car rearview camera, yellow one to othervideo equipment.
Parking rearview priority: The monitor will start up automatically, and
synchronously display the video from rearview camera when you\'re backing your car;
the monitor will close itself after backing. Scenes will cut to rearview
camera automatically while you\'re backing the car and change back to the original scenes after that.
Supports Car DVD, VCD, camera, STB, satellite receiver, and other video equipment.
Screen rotatable.
With menu buttons, Brightness/contrast/hue/saturation/language (Chinese/English/Spanish) adjustable.
Easy to install.
Low power consumption.
No Audio input or output

Specifications:
Screen size: 4.3 inch
Resolution: 320*240
Aspect Ratio: 4:3
Power Supply: DC 12V
Housing: ABS
Product size: 127x88x25mm
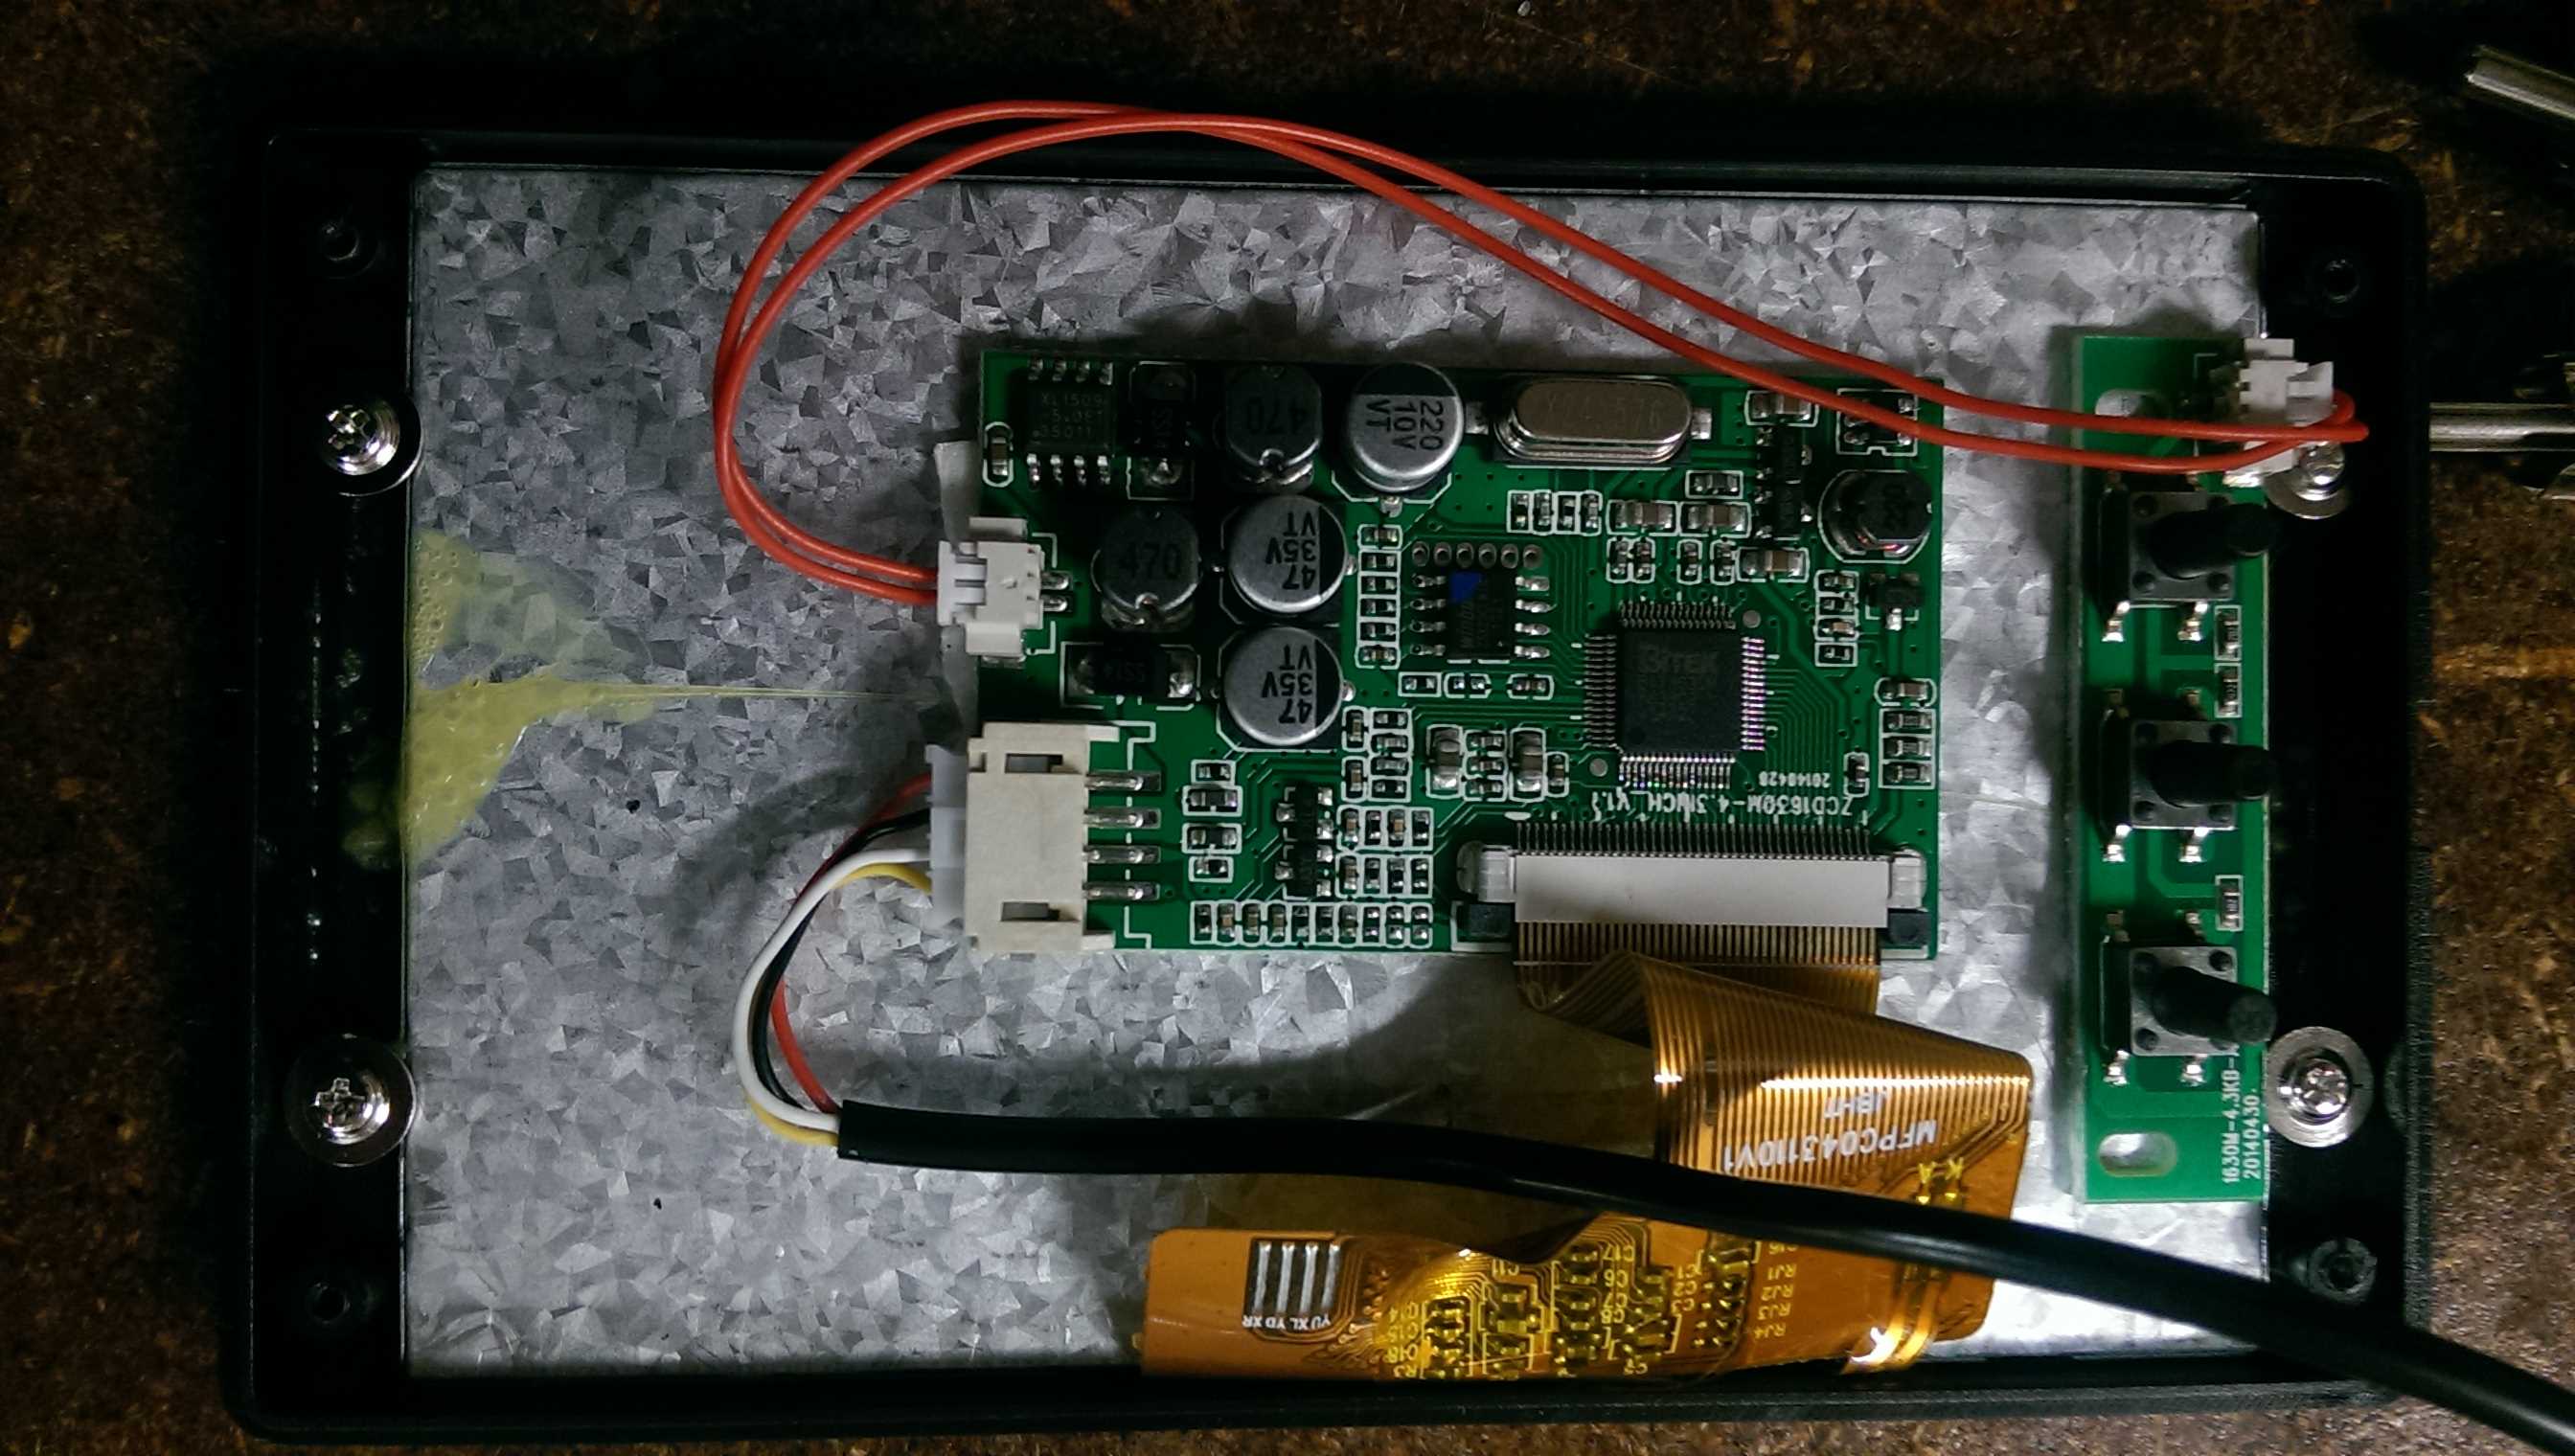

On inspection notice there is an area with lots of large capacitors and inductors. Then note that the IC in that area is called XL1509_datasheet, and it is a DC to DC stepdown buck converter (converting from 12V to 5V.)
You can guess which rail is 12V and 5V by how large the capacitor rating. The larger capacitor is rated up to 20V, is more likely to be for 12V instead of 5V. While the capacitor rated at 10V will work for 5V.
There is also another converter rated for 5V to 3.3V I think.
The 3.3V converter to deal with the lcd screen that looks like it came from a smartphone.
Anyway it seems that the solution should be simple. To solder a 5V wire directly to the output of the buck converter.
The only issue is that if we wanted to use usb power, we need to be mindful that there is a current limit for each usb port. And that the monitor may be power hungry beyond what a single usb port can provide.
So just need to modify the device to accept 5V instead of 12V.
Just decided to power it up via 5V (not usb). Works still. Very interesting. Possibly because it is switch mode buck converter, it has less of a minimum voltage drop required (compared to a cheap large current LDO). Or maybe I just got lucky with this design.
Of course we got to test if this can still run off usb power.
Overscan
Do note that you need to adjust overscan for the device. I don't know if you need to adjust overscan for every device, or if the same setting can be applied across the same model of car monitors. Adjusting overscan, means you use the maximum amount of available LCD screen space, and ensure that the picture is clearer and the text is more readable.
Initial adjustment of overscan amount of "5px" leads to top right and bottom with empty pixels. Over a process of observation and adjustment in increments of 5px or less, an acceptable overscan setting
Below is part of the settings that was modified in config.txt (from the NOOBS interface):
# PAL+ resolution is generally 1024x576
console-width = 1024 # 1280
console-height = 576 # 720

# uncomment for composite PAL
sdtv_mode = 2

# NOOBS Auto-generated Settings
hdmi_force_hotplug = 0
config_hdmi_boost = 4

# We want to enable overscan so set to "0"
disable_overscan = 0

# Adjust overscan until it fits ( neg number expands, pos number shrinks screen)
overscan_left = 5
overscan_right = -25
overscan_top = -15
overscan_bottom = -18

# Start windowing desktop display
start_x = 0
Further Readings:
-
https://bhavyanshu.me/tutorials/force-raspberry-pi-output-to-composite-video-instead-of-hdmi/03/03/2014/
-
http://www.raspberrypi-spy.co.uk/2012/11/cheap-miniature-lcd-screen/